Tutorial 2: Refresh Token Management Automation
Uses timestamps and a json file to automatically manage refresh token expiration.
Prerequisites
- You have created a Refresh Token from an API call using the previous concur-get-refresh-token tutorial.
- SAP Concur instance credentials
- Node.js
- GitHub account
- IDE or text editor
You will learn
How to manage refresh token expiration using timestamps and a json file.
Regenerate Your Company Request Token
- Go to the Company Request Token screen.
- Enter your App ID in the required field and click Submit to regenerate your company request token.
- Copy/paste the Company UUID and company request token fields to a text file.
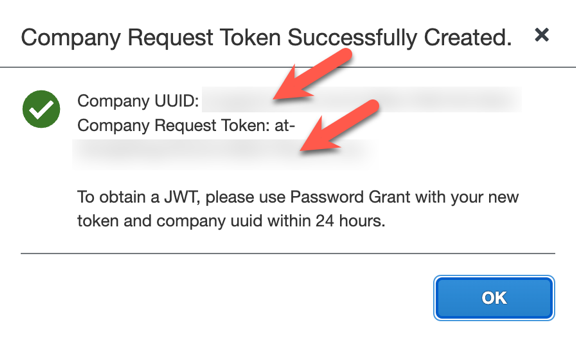
- Click OK after you have saved this information to a text file.
Setup the NodeJs App
Open the NodeJs sample code - RefreshTokenManagement in your IDE or text editor.
Regenerate Your Credentials File
- Type
node RefreshTokenManagement.jsin terminal to run the app to generate yourcredentials.jsonfile. This generates messages in the terminal that show the credentials object.
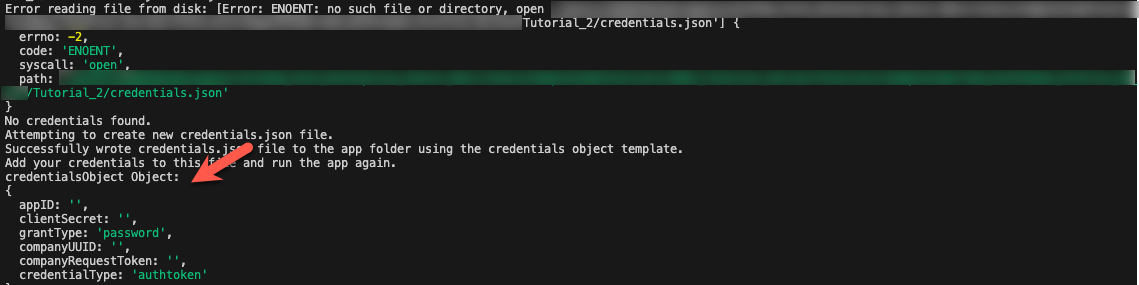
- Fill in the empty fields in this file with the information in the credential object. You can use all of the information from your
credentials.jsonfile in the previous concur-get-refresh-token tutorial except for the company request token.
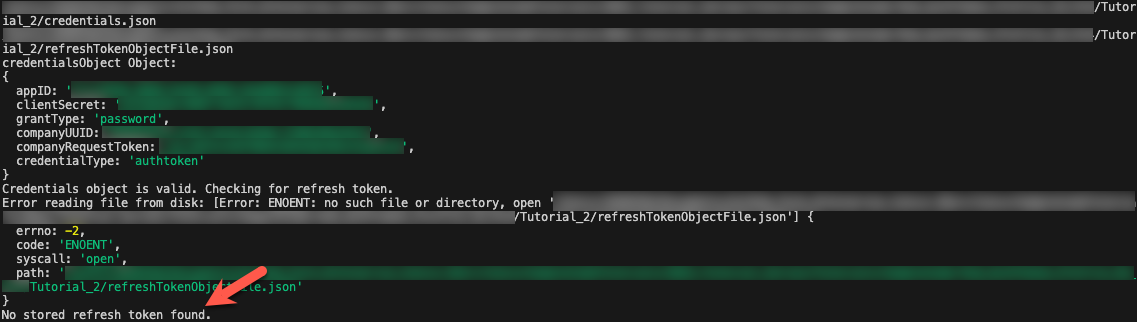
Regenerate and Store Your Refresh Token in a JSON File
- Run the app again. Since the app does not have a stored valid refresh token, the app will not find a valid refresh token in
refreshTokenObjectFile.json.
- The app will call the Oauth2 /token endpoint using your credentials and regenerate your refresh token.
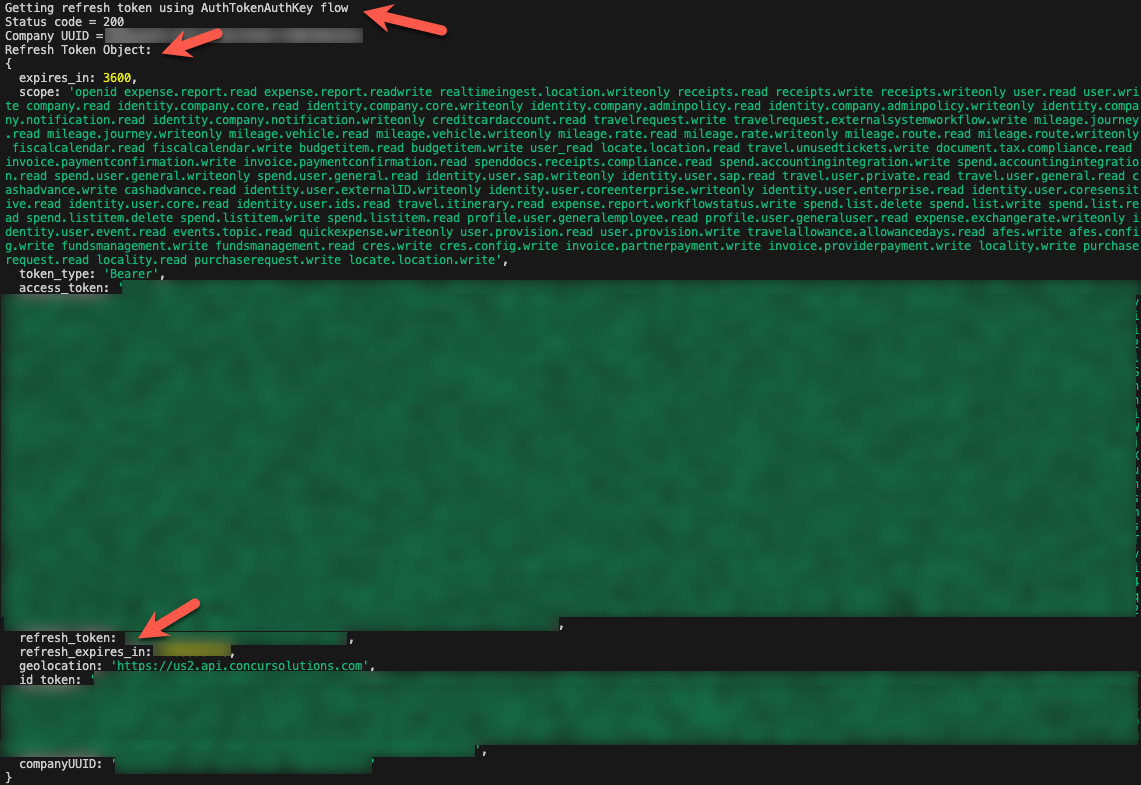
- If the API call is successful, the refresh token data is converted from JSON format into a refresh token object and stored in the file
refreshTokenObjectFile.json.

Load Your Stored Refresh Token from a JSON File
- Run the app again. Since the app now has a valid refresh token, the app will successfully load and check the validity of the file
refreshTokenObjectFile.json. - Check for a successful validity check on the refresh token object loaded from
refreshTokenObjectFile.json. If the refresh token object validity check is successful, the refresh token object will be stored in the app for use with future API calls.